By the tiswa editorial team, from the official sources listed at the end of this guide. How we write our guides
You watched twenty graphic design videos this month, and when a classmate asked for a logo for the college club, you sat in front of a blank screen for an hour. The shortage is not courses; there are plenty and many are free. Watching does not train your hand. A small project with a clear start and finish does.
Where can you find free graphic design courses?
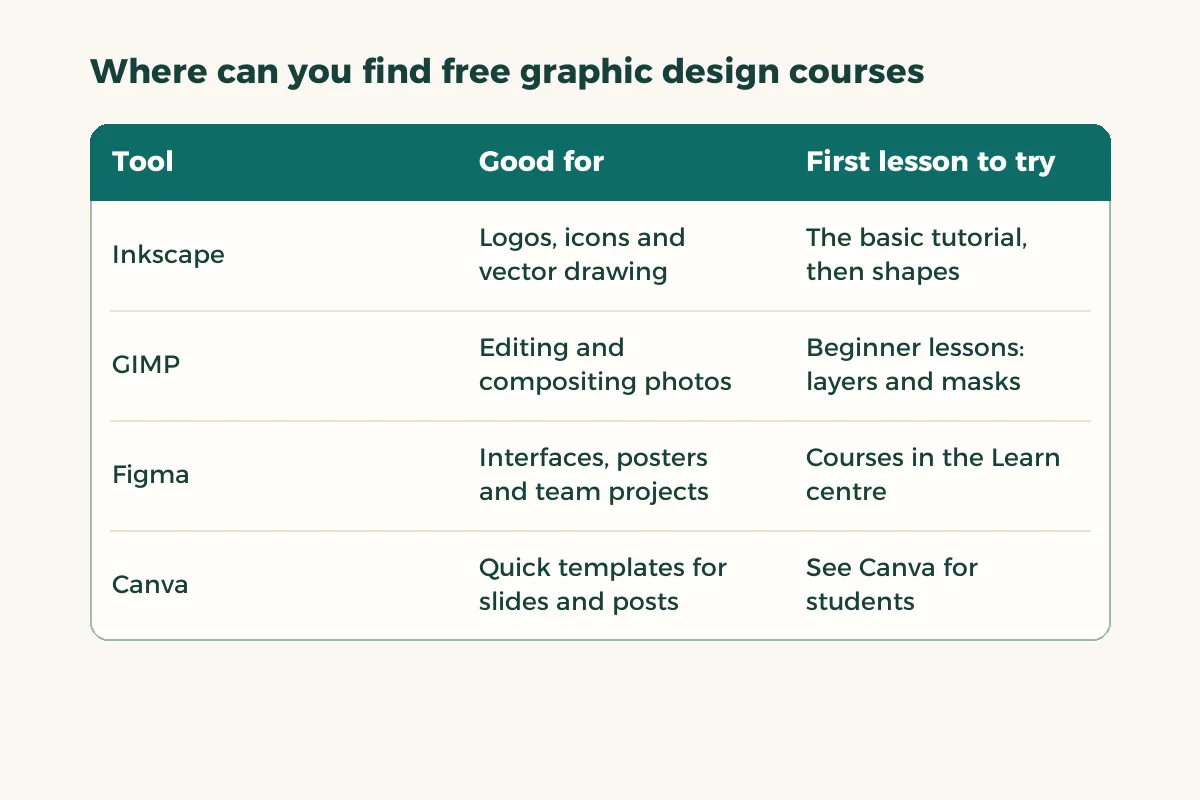
Three official sources are enough to start. Inkscape, the free vector drawing program, has a learn page with written tutorials covering the basics, shapes and more, and the same tutorials open inside the program from the Help menu.1 GIMP, the free image editor, has a tutorials page written by its user community, with beginner lessons on layer masks and colour curves.2 Figma’s Learn centre lists courses, tutorials and projects for its tool.3
| Tool | Good for | First lesson to try |
|---|---|---|
| Inkscape | Logos, icons and vector drawing | The basic tutorial, then shapes |
| GIMP | Editing and compositing photos | Beginner lessons: layers and masks |
| Figma | Interfaces, posters and team projects | Courses in the Learn centre |
| Canva | Quick templates for slides and posts | See Canva for students |
If you want a broader comparison of software and student pricing, we have graphic design software for students. Here the focus is what you can learn at no cost.
How do you build a path from free graphic design courses that ends in a project?
In this example the project is a small identity for an imaginary student club: a logo, two colours, two fonts and one poster for an event. It is an exercise, so do not put it on a real brand without permission.
- Week 1: the logo
Draw five simple shapes in a vector tool, save the best, and avoid tiny details that vanish when the logo is small.
- Week 2: colours and fonts
Choose two colours and two fonts only, then write the club name in every font you tried and compare.
- Week 3: the poster
Combine logo, colours and fonts in one poster, with the title first and the date and place smaller.
- Week 4: test and adjust
Show the poster to three classmates, ask what they saw first, and adjust according to what they say.

Keep three files at the end: the logo, the colour and font sheet, and the poster. That is the core of your portfolio; build a portfolio shows how to arrange it, and graphic design co-op portfolio has details for students heading toward training.
Do free graphic design courses give a certificate?
Some do and many do not, and each course page is the reference. The Inkscape and GIMP lessons are open learning material, and their pages do not promise a certificate. Figma’s centre describes courses and projects, and any certificate terms are on the course page itself.123
In design, a certificate matters less than the work. Whoever reviews your training application opens your portfolio and sees the poster before they see the paper. If you need a certificate for your general profile, read free courses with certificates.
What mistakes do beginners make learning graphic design?
- Mixing more than two or three colours and fonts in one design.
- Starting with a complex tool before understanding shape, colour and spacing.
- Copying a design you saw and posting it as yours.
- Using an Arabic font without knowing its licence.
- Measuring progress by lessons watched, not by designs finished.
Arabic text has its own checks. Type the club name in Arabic in your tool before you adopt a font, because some tools and fonts connect letters differently. And if graphic design is your major, read the graphic design major to see what lies ahead.
How do you split your time between lessons and design?
A simple rule: thirty minutes to learn and an hour to practise. A lesson you watch for thirty minutes helps only if you open the tool afterwards and try what you saw. If you have just one hour, spend all of it practising and rewatch the lesson once.
| Day | Activity | Output |
|---|---|---|
| Saturday | One lesson, then a trial | A new shape or colour in a scratch file |
| Monday | Work on the project | One change to the logo or poster |
| Wednesday | Work on the project | One change and a new saved version |
| Thursday | Show a classmate | One question: what did you see first? |
Save a new version after every change under a numbered name, so you see your progress and can undo a mistake without losing anything. In exam weeks make just one change a week, since the path can take a short pause.
How do you show the small identity in your portfolio?
Show the work in story order: the problem, the attempts, then the result. Put in an image of the five logos you tried, then the chosen logo, then the final poster, and write one sentence under each image explaining the choice. Whoever reviews your portfolio cares more about how you think than about the outcome alone.
Do not say the work was for a real brand if it was an imaginary project. Say it plainly: an identity for a fictional club, made with a free tool in four weeks. That honesty protects you from interview questions and makes the piece more credible than one claiming what it is not. If you are looking for training, this connects to what hosts ask for in the co-op portfolio.
What comes after the first lessons?
Repeat the project with a different club and a different style, because repetition builds visual judgement. Then move to work that carries information, such as an infographic. If you need paid software at a student price, check student discounts in Saudi Arabia before you pay.